You may have thrown in the 9-5 job for the digital nomad lifestyle, but that doesn’t mean you don’t still need a solid CV. Whether for the occasional part-time job or freelance opportunity, you will get asked for a current CV, so it’s best always to have one prepared. Here’s an easy Resume or CV with LibreOffice that you can make in minutes.
I have reviewed, revised, and rewritten thousands of CVs during my work as a consultant. In this post, I will guide you through making a CV with LibreOffice in the most efficient way possible, avoiding common problems.
This CV is suitable for anyone as it is a standard CV or resume. Most companies will expect a CV in this style, many preferring not to get CVs with color and pictures or simply as website links.
The purpose of your CV when you apply to a company is for HR to assess whether or not to give you an interview. Your interviewer or manager may briefly review the CV before you enter the interview, but the primary purpose of this CV is to make it easy for HR to find their requirements and put you into a yes or no pile.
HR is usually looking for Education level/qualification, Relevant work experience, and relevant skills. This means that they will skim your CV for those requirements and ignore the rest.
In making this CV, we want that information easily accessible to HR, so I have put a Summary or Profile section at the top.
As this CV is based on a table layout, it is easy to make changes later as you upgrade your skill set or change companies. You never need to worry that the formatting will break or look messy. The table will take care of that.
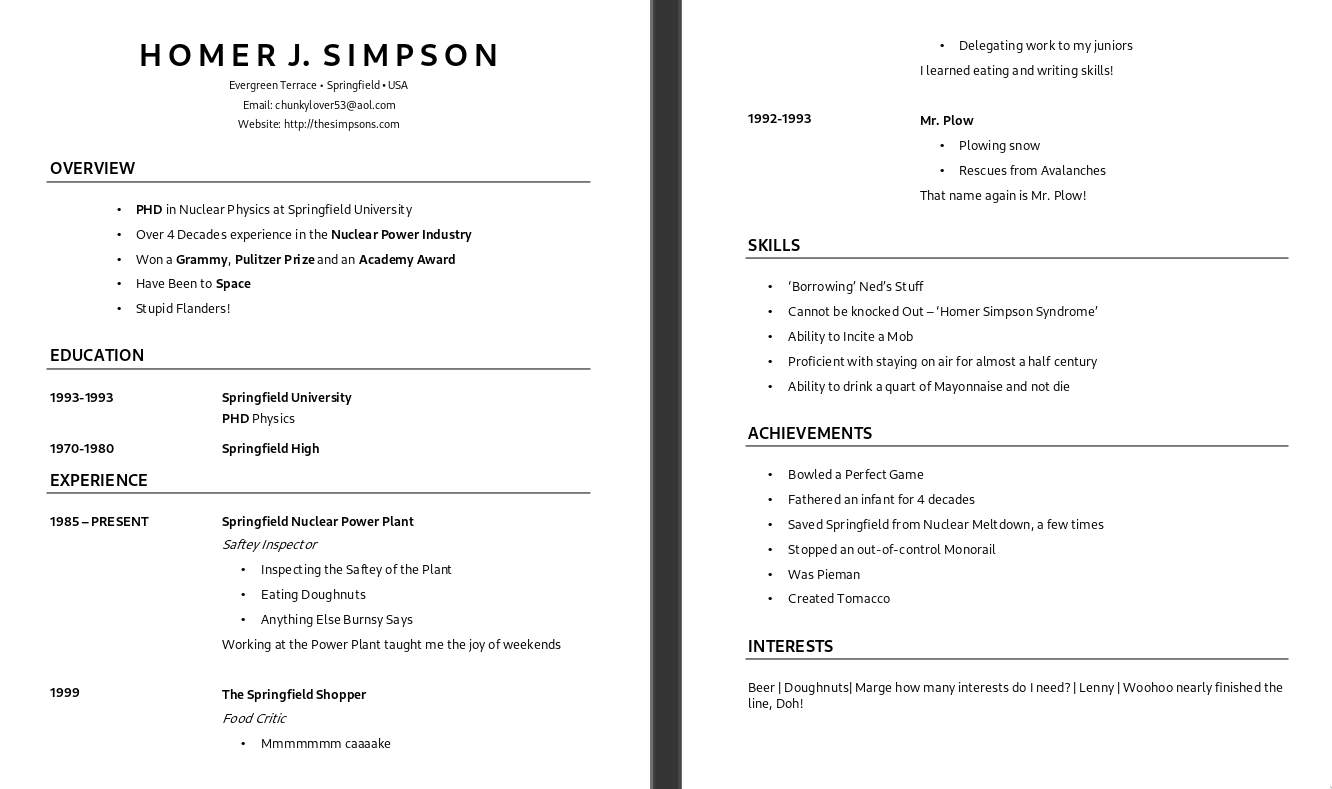
Here is the CV we will be creating.
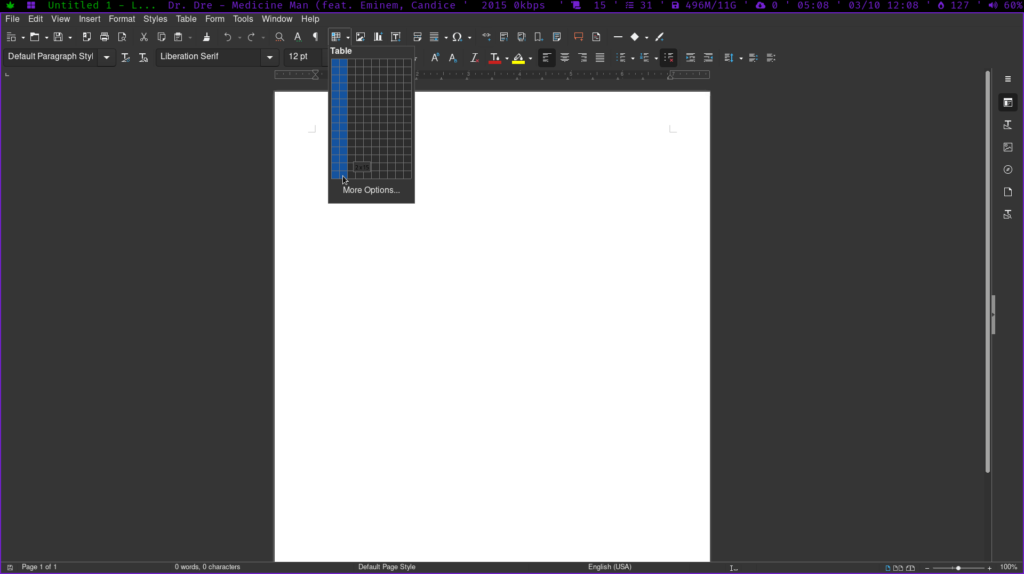
Create a Table
We start by creating a two-column table. The number of rows doesn’t matter; you can increase it later by right-clicking when necessary. The first column should be 1/3 width and the second 2/3. The table will keep everything in our CV aligned and allow us to insert rows anywhere when we need to make changes.
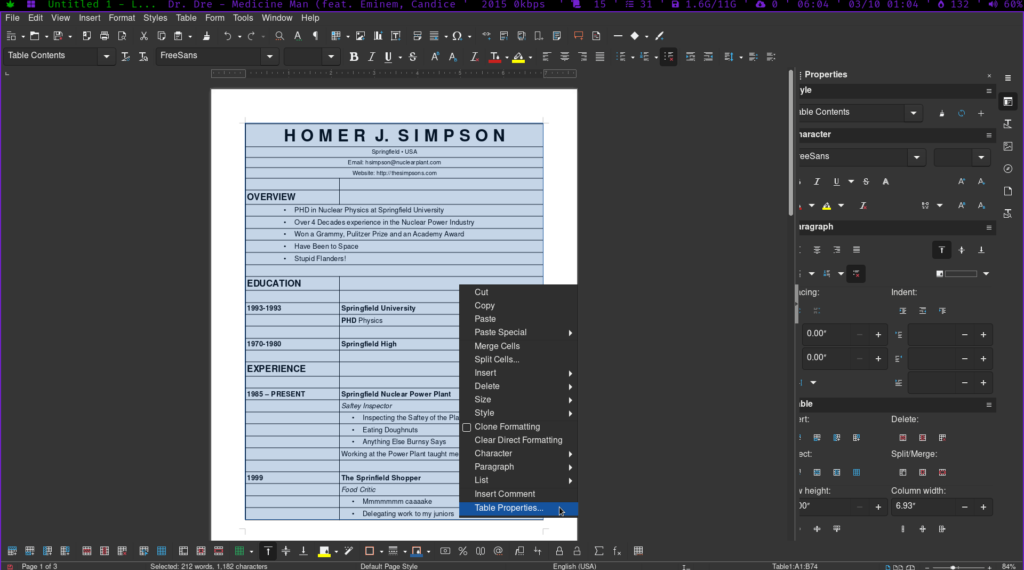
For now, we will keep the table’s borders on for ease of use. Once we have added our content, we can hide the borders, so no one will know you used a table.
We can merge columns of rows that we want to span the entire width by highlighting them, right-clicking, and selecting ‘merge cells.’
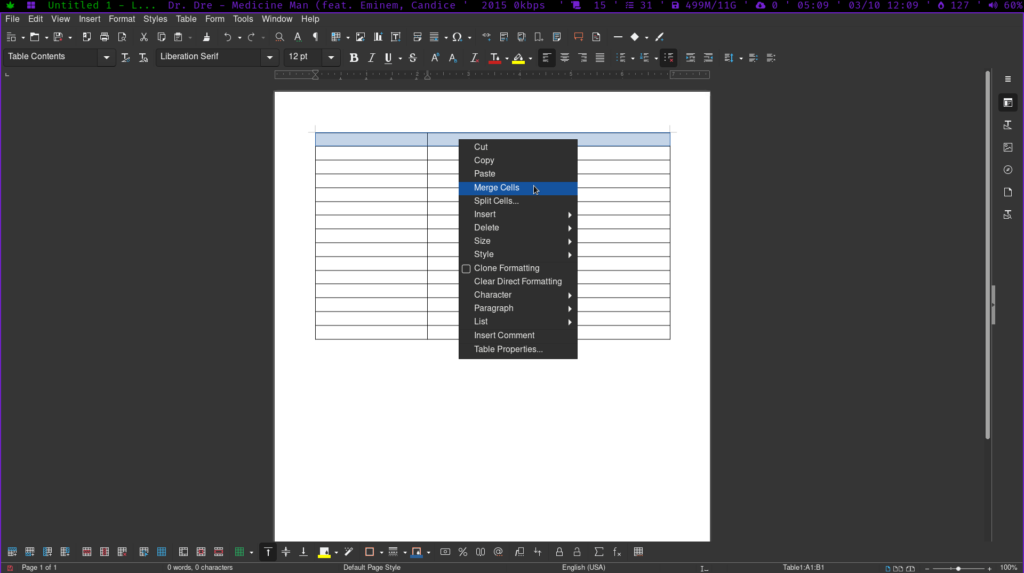
The first few rows of the table should be merged for your name, email, and address.
- Choose an easily readable sans serif font.
- Your name should be the title of your CV, not “curriculum vitae” or “resume” or “Homer’s resume,” just your name.
Create your overview section.
- Degrees/Academic Qualifications
- Most relevant work experience
- Languages spoken (if necessary)
- Most impressive award/achievement (if appropriate)
- Most impressive skill (if applicable)
The point of this section is to give HR all the information they are probably looking for.
Create your education section.

- If you have a degree, most companies won’t care about your high school qualifications though you can include them if you want.
- Dates in the left column
- Institutions and qualifications in the right column
Create your work experience section
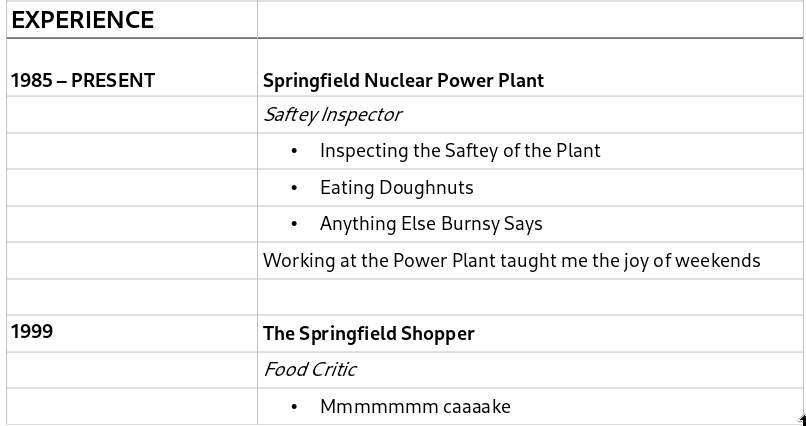
- Dates in the left column
- Companies and positions in the right column
- Use bullet points to detail your Responsibilities (what you did in the job)
- Write no more than three responsibilities
- Keep bullet points short and to the point
- Positions from 10 years ago or longer can be omitted or reduced by not adding the responsibilities
Create a Skills section
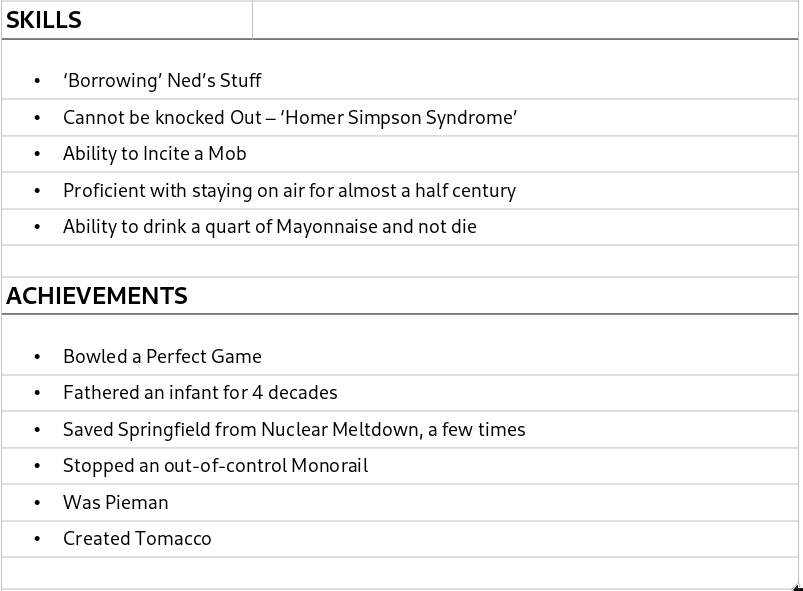
- Full Width
- You can include any specific skill you have e.g.
- Sales copy
- Programming Languages
- Photography/Videography SKills
- Software
- Languages
- Time Management
- Research
- Database
If you’re running low on skills, take a look at this post about why starting to learn a language might be the right choice for you.
Create your Achievement Section
- Full Width
- Include any qualifications or achievements you have e.g.
- Previous training
- Published articles/websites/music/videos
- Sports/Physical Achievements, e.g., “State Champion”
- Any Certifications
Interests or Reference Section
Finally, I added an interests section here, but you could also replace this with a REFERENCES Section with a single bullet point.
- Available on Request
Remove Table Borders
Tips
- Use One font – To avoid it looking messy
- Use one size for Headings and one for everything else; multiple sizes will look unattractive.
- Bold – If you want to emphasize something, use bold; that’s what it’s for.
- If you want to have perfect formatting regardless of what is being used to view your CV, export it to PDF (it’s in ‘File’)
- The file name should be ‘your name – CV,’ e.g., Homer Simpson – CV
- Keep bullet points brief
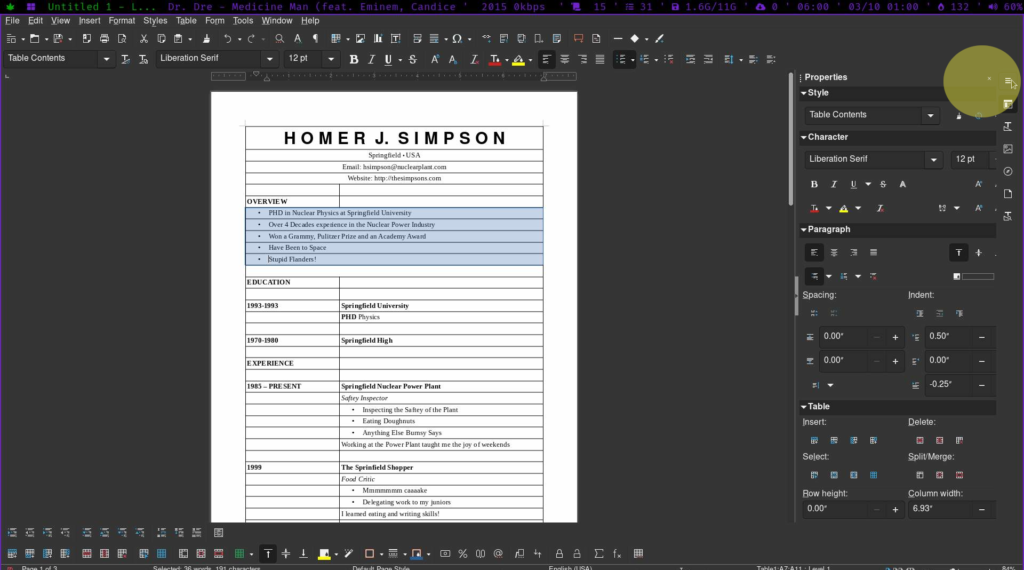
- The Properties Menu gives you more formatting control
- Indenting Options can be found in the Properties Menu
- Spacing can also be changed in the Properties Menu


1 thought on “Resume or CV with LibreOffice”
Comments are closed.