We’re in the middle of a personal knowledge management revolution right now. The software has caught up to the ideas. It’s changing how we work and learn, and Obsidian is emerging as the number one note-taking or second-brain application. With its ability to mimic how our minds work, no one will benefit more than students. Learn how to use Obsidian for students.
Table of Contents
Why Students Should Use Obsidian
As you take your studies to higher levels, you need a tool that will grow with you. In high school, you can get away with taking notes in a notebook and still making the grade. But when you get to the undergraduate level and beyond, things start to get more complex, so you need a sophisticated tool to keep up with you.
There are plenty of reasons to use Obsidian.
Bi-directional Links for Better Ideas
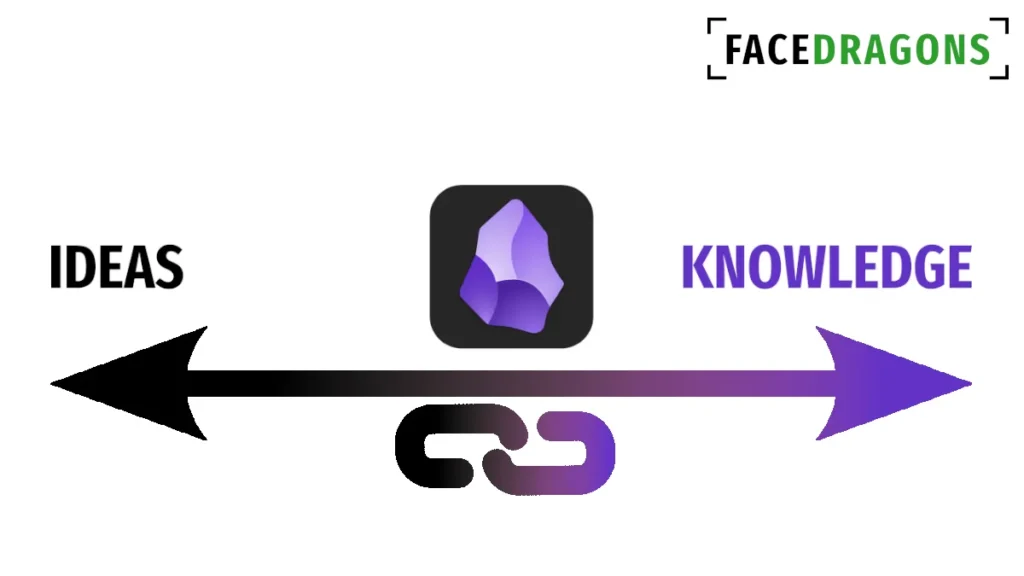
All of our knowledge is linked together in the mind. You think of your friend and remember that you need to give him his headphones back. That gets you thinking about music and looking for a new playlist for the journey home. As your thoughts go from one idea to the next, you’re surfing this interconnected web of ideas and creating new ideas where they intersect.
By linking your notes together, you create a web of your academic ideas you can browse in the same way.
Wikipedia is a web of knowledge. You look at one article, click on a link to see something related, and end up reading something seemingly unrelated to the first page. Realizing that those two ideas are connected somehow gives rise to a spark of inspiration or a flash of creativity.
Obsidian takes this idea a step further with bidirectional linking. In Wikipedia, links usually only go one way; once you’ve clicked through to the second article, there is no link back to the first. In Obsidian, each note keeps a record of all the other notes that link to it; these are called backlinks.
Backlinks are a great way to come up with new ideas for writing. Suppose you want to write an essay about “Roman Currency.” First, you can take a look at your note about it and the wiki-style links there. Then check the backlinks to see which notes link to your “Roman Currency” note. All of these connections will give you ideas to explore and write about.
Instead of a dull and predictable essay about when the denarius was first minted and the price of a sack of grain, your links connect you to ideas of how coin-minting technology influenced sword-making or some other novel idea that makes your essay stand out.
Obsidian Templates for Students
As a student, you likely make similar kinds of notes every day.
- Lecture notes
- Essay Outline
- Brainstorming
- Journals
Obsidian’s templates core plugin will help automate some of the repetitive aspects of keeping your notes. You need to know some Markdown when using a note-taking app like Obsidian and when creating these templates. But you can learn Obsidian’s markdown syntax quickly here.
Creating a template with the date and sections for course details and assignments can save you a few seconds and let you jump right into taking your notes. Use this template for lecture notes by just adding a link to your course MOC (explained below.)
Year: [[College MOC]]
Course: [[]]
Date: {{date}}
Lecture {{title}}

## Main Points
-

## Related Books
-

## Things to Memorize
-

## Assignments
-
Obsidian Plugins for Academics
Obsidian’s most significant advantage over other note-taking apps is the vast number of plugins available.
If Obsidian doesn’t do exactly what you want, someone has probably already made a plugin that does. Install the best Obsidian Plugins in seconds and create unique ways to keep your notes and a truly customized academic experience.
Here are the top three you must have as a student:
- Dataview
- Calendar
- Homepage (for your College MOC)
What’s wrong with making handwritten notes?
Higher education and graduate school students have handwritten their notes for decades, and techniques like the Cornell Method, which uses pen and paper, have consistently produced student success. Is it really time to declare that digital note-taking is now king for college students?
Leaving aside your messy handwriting for now, there are many reasons that Obsidian and other second-brain software are the most effective note-taking methods used by graduate students today.
Say you take an introductory history course in your first year. You take out your notebook and jot down important ideas while the lecturer talks. Then, you look back at the notes when you want to write an essay or revise for a test.
The following year, however, you take another history course that goes more in-depth. You can’t add notes to last year’s notebook – there’s no space -but you also don’t want to rewrite the ideas you learned last year (some of which you’ve already forgotten.)
You need a system that doesn’t make your old notes obsolete at the end of a course, notebook, or year.
Instead, a digital system will let you reuse the previous year’s notes. In a note-taking application like EverNote, typing more to the note you wrote last year is always an option. But that brings up more problems. Do you move the note into a new folder? What about the stuff I don’t need from last year?
Obsidian will let you refer to previous notes in a much more sophisticated way. Applications like Evernote won’t even let you make links! So, consider migrating from EverNote to Obsidian if you haven’t already done so.
In Obsidian, you can link to another note just like a Wikipedia page does. Or you can embed last year’s note directly into this year’s one. You can even embed just the relevant section of the note.
How to Use Obsidian for Students
Step 1: Setup
Start by downloading Obsidian on all your devices. You can go to Obsidian.md to download the Windows, macOS, and Linux versions. Android and iOS apps are available in their respective app stores.
Once installed, you need to create your Obsidian vault. I recommend you do this on your laptop or desktop and then sync your Obsidian vault to your devices.
Now is the time to decide how to organize your notes. There are an infinite number of ways you could do this. Here is a good starting place using maps of content; make it your own.
- Create a college MOC – a list of every course you take with links to your Course MOCs (number 2)
- Create a dynamic course MOC, e.g., “History of Rome MOC,” “Roman Literature MOC,” etc.
- Create a folder for each course
Install dataview to make the following dynamic Course MOC work.
# History of Rome MOC

## Themes

```dataview
LIST
FROM "History of Rome"
WHERE !contains(file.name, "Lecture")
```

## Lecture Notes

```dataview
LIST
FROM "History of Rome"
WHERE contains(file.name, "Lecture")
```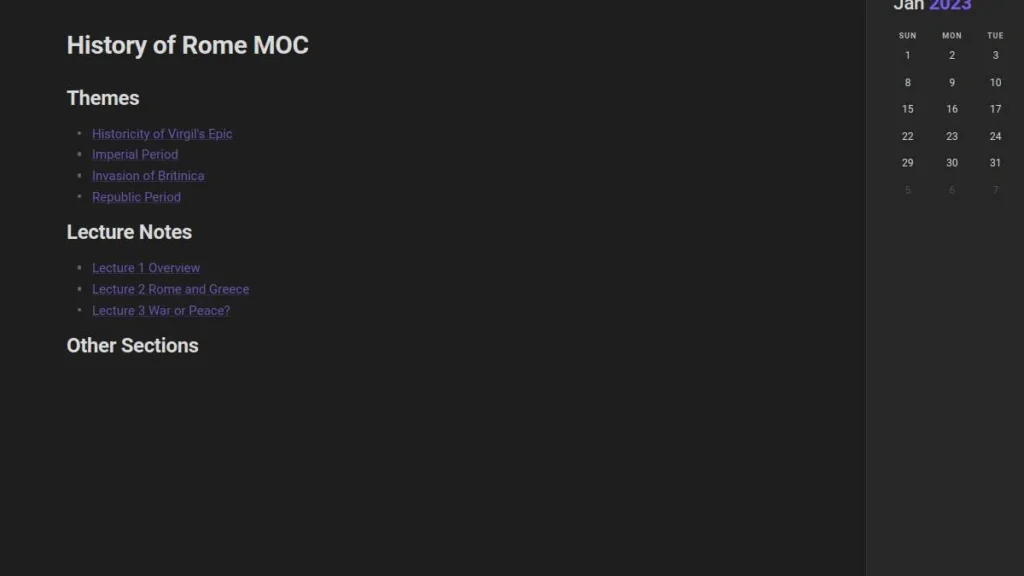
When you write notes in lectures, you simply need to include the word “Lecture” in the title, and it will automatically appear in the lecture section of your Course MOC. If you like, you can create a third section for reading notes or other resources. Build whatever might be useful to you!
Any other notes you create within the “History of Rome” folder will appear as a list of links in the “Themes” section.
A section for notes with a certain tag could also pull in notes from other courses. For example, suppose you are also taking a “Roman Literature” course and reading Tacitus. In that case, you could tag the note with #RomanHistory and use dataview to pull that into your History of Rome MOC.
Step 2: Take Notes
This first step may seem obvious, but you must take your laptop out and make notes. During your lectures, seminars, while reading, or during discussions. If you don’t take notes in the first place, you’ll have nothing to manage or draw from later on. You’re just letting all that knowledge slip through your fingers. Don’t have your laptop handy? Get the Obsidian mobile app and make your notes there!
Jotting down notes in Obsidian is simple. Hit the “New Note” button and start writing. Ensuring Obsidian is installed on your phone is a huge advantage; you can still write down your digital notes even if you don’t have your laptop with you.
When taking your initial notes, don’t worry too much about formatting, category, linking, or organizing your notes; just summarize and get the information into your system. Then, you can come back later to tidy it up.
Step 3: Process Your Notes
Taking notes is a good start, but it isn’t enough to help you produce a world-class thesis or ace your exams. The real magic comes when you go back through your notes, delete what is unhelpful, and move the valuable information into a “theme note.” Within our example, “The Gallic Wars” or “Caesar’s Murder” might be themes you use.
A single lecture may include information about many different themes, so keeping only lecture notes is unhelpful when writing an essay on a certain topic, i.e., a theme. Instead, you want all the knowledge and references about that theme in one place. Of course, you can link to other themes or other notes when necessary when you need to draw in extra information.
- Lecture notes are for input, i.e., gaining knowledge
- These notes are for output, i.e., using that knowledge
Here’s the process:
- Take lecture notes or reading notes or capture other information
- Read your notes and look for emerging themes
- Create a theme note
- Add information from your capture notes to your theme note, then rewrite and expand the knowledge.
- Create links and add tags to other notes where appropriate
Step 4: Review Your Notes
Obsidian has a “viewing mode” for when you want to browse through your second brain. You can toggle it on and off in the top right of the screen. If you’re not editing your notes, this is how you should view your PKM; it’s especially handy for revising and preparing for exams. In view mode, you can click links and tags to see the connections you made between your notes.
Go Study
All that’s left is to go hit the books! Don’t forget to take notes!

